DIY Swimplatform and Stairs

quote:

Originally posted by DUSTCUTTER

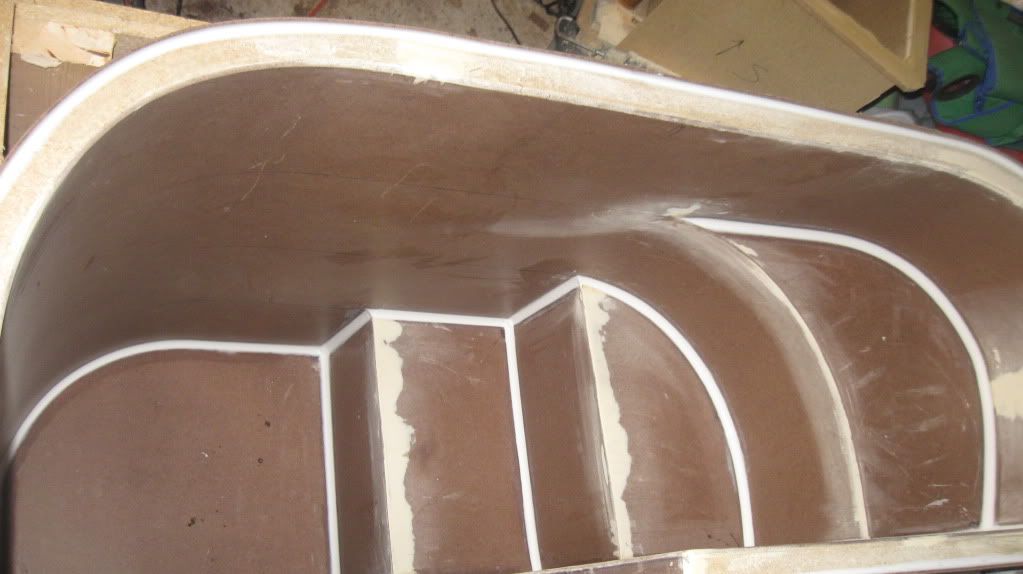
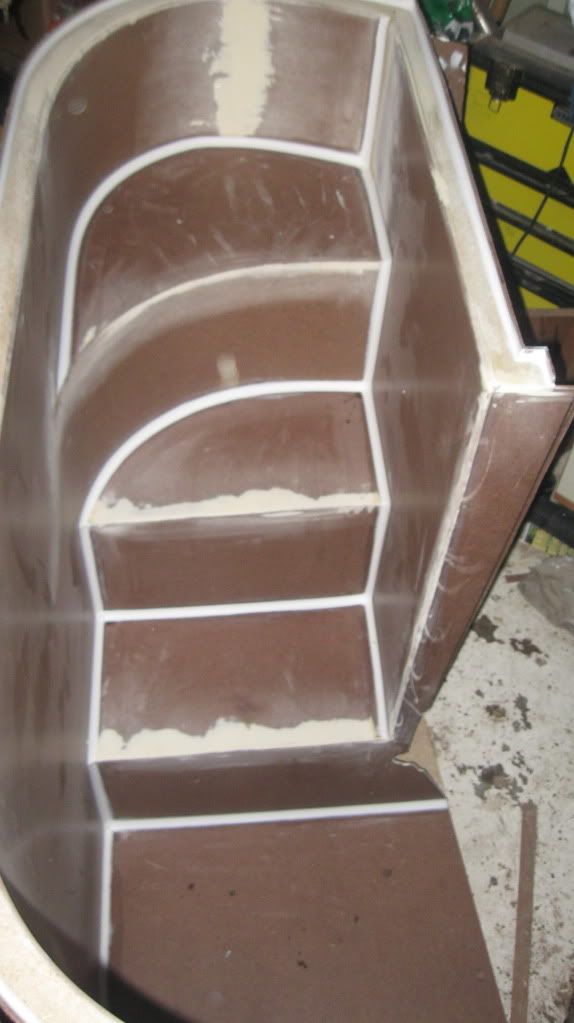
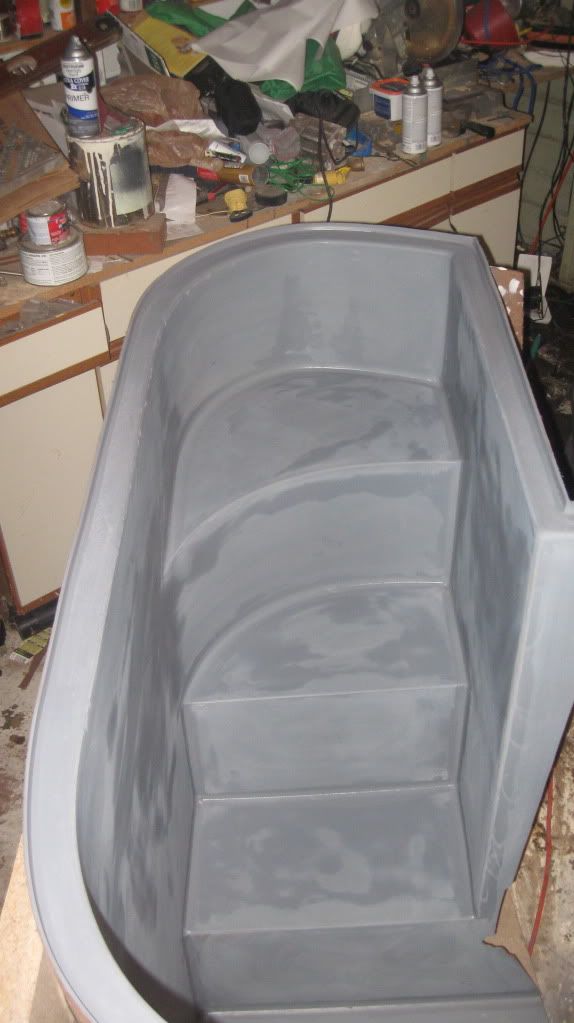
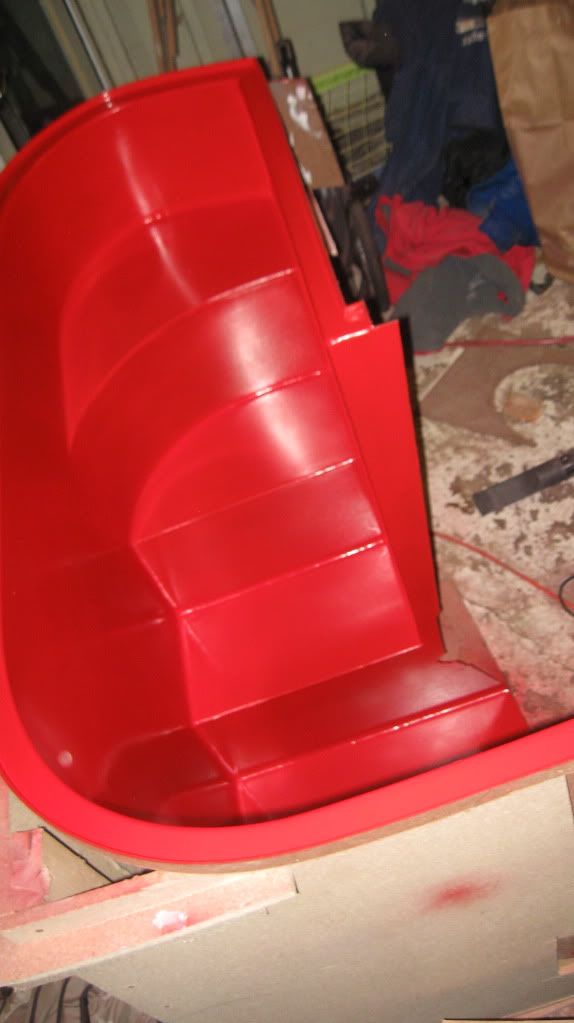
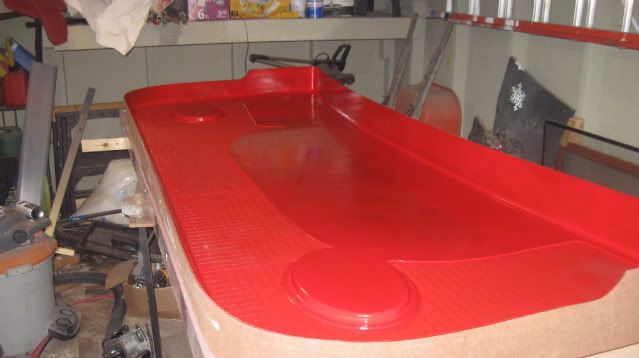
What is height of staircase, from top of swim platform to top of aft deck?

Ron


Ron

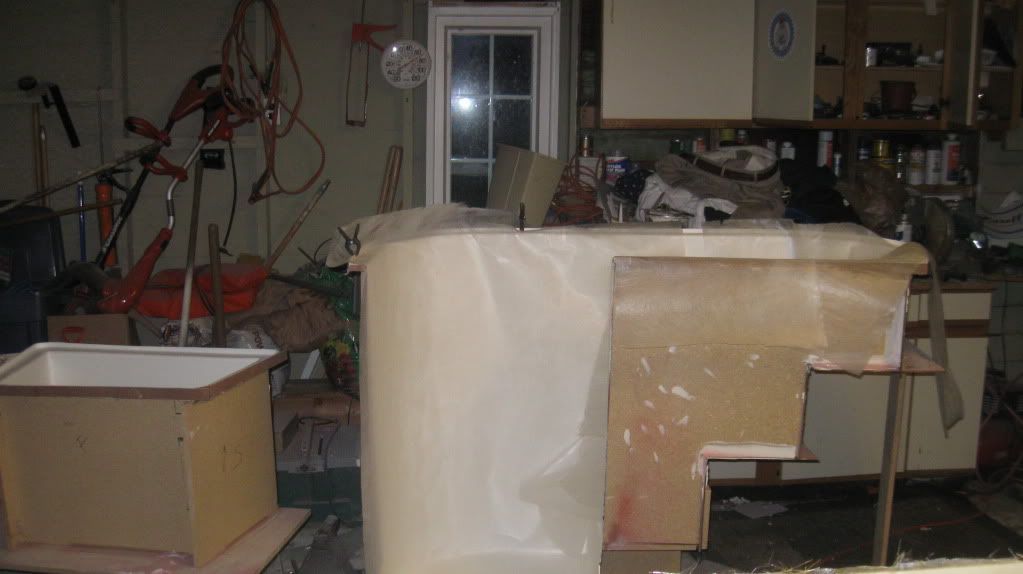
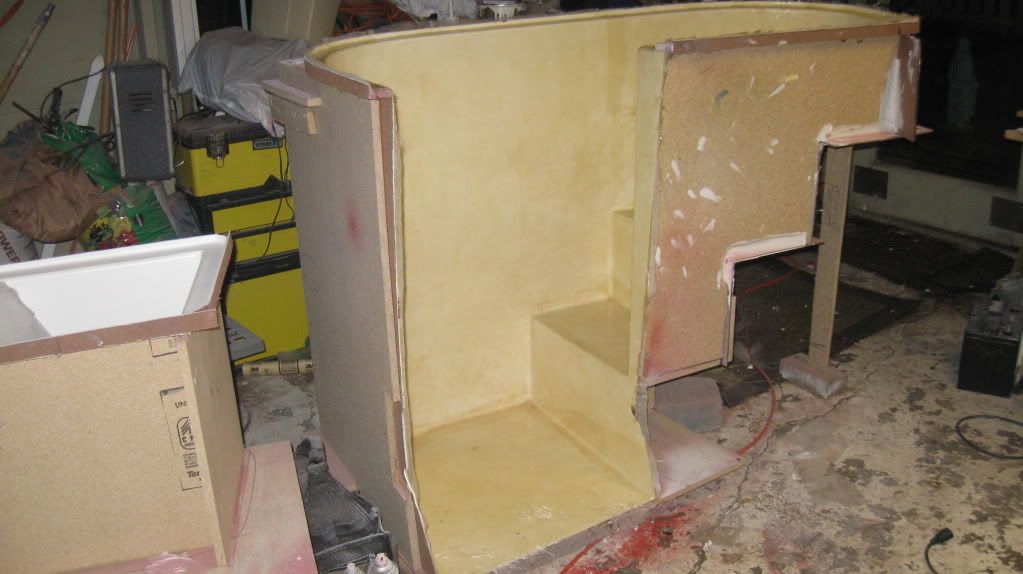
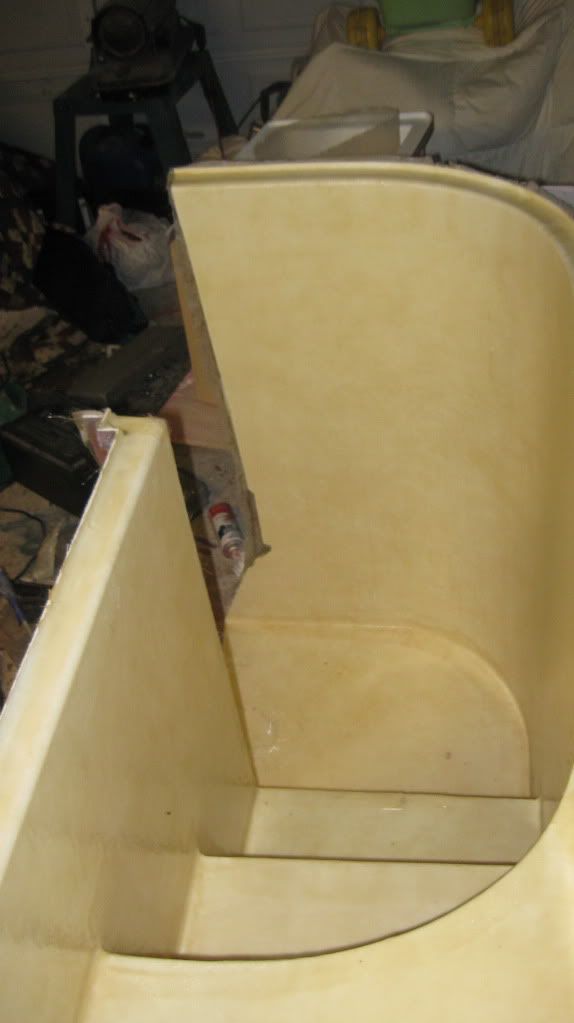
The steps risers are 10-1/2" each at total of 4
so the platform to the top of the stairs/winder is 42" and from this top stair/winder is about 10" to the top of the Aft or so. giving the height - platform to top of the aft deck around 52". I can measure the pattern tonight but the the sairs themself do not go all the way up to the aft. the last riser is actually the aft deck. Let me know if this is close enough or if want i can mearsure the paper pattern to detrimine the exact height of the platform to top of Aft
 
In about 2 wks I will be at the boat. I will get a measurement. However, I think we are about 60"/65" from platform to aft deck.

Ron
 
quote:

Originally posted by DUSTCUTTER

In about 2 wks I will be at the boat. I will get a measurement. However, I think we are about 60"/65" from platform to aft deck.

Ron


Ron

In looking at the transoms of the 3207 & 3607 it apears that the difference in height is above the rub rail
 
This week ends progress on the molds if anyone is intrested.

Stairs - Corners are rounded and ready to painted

Swimplatform - First coat of primer. will need to sand and repeat untill it is smothed out.

should be finishing up the molds by this coming weekend. then its off on vacation for a few weeks. Then its time to Wax the plugs and start the fiberglass layup

IMG_18451024x575.jpg


IMG_1846.jpg


IMG_1863.jpg


IMG_1850.jpg


IMG_1849.jpg
 
Wow, nice work! enjoy your vacation, looking forward to see the projet move ahead.
 
-Quick update-

The Plug for the Platform is complete. Ready for Gelcote and Fiberglass when i get back from vacation. The Red color will help in making sure I have a even coat of white gelcoat.

The stairs are primed and sanded ready for their red coat.

IMG_1874.jpg


IMG_1884.jpg


IMG_1891.jpg


IMG_1872.jpg
 
Are there plans available for that swim platform? I would LOVE to make one for my boat.
 
Your project looks great, however I have a question regarding the structural integrity. Are you planning to incorporate any stainless steel square tubing inbeded in the fiberglass to provide longitudinal stiffness? It looks like the swimplatform is 40 - 48" deep which may require this. On my platform which is 14' wide and 48" deep it include additional box tubing within the fiberglass to provide stiffness to the platform to help minimize flexing or bending when standing on or placing heavy object on it.

Otherwise, It looks great, can you build me a hard top for my boat?

117662488.jpg
 
quote:

Originally posted by Starry Night

Your project looks great, however I have a question regarding the structural integrity. Are you planning to incorporate any stainless steel square tubing inbeded in the fiberglass to provide longitudinal stiffness? It looks like the swimplatform is 40 - 48" deep which may require this. On my platform which is 14' wide and 48" deep it include additional box tubing within the fiberglass to provide stiffness to the platform to help minimize flexing or bending when standing on or placing heavy object on it.

Otherwise, It looks great, can you build me a hard top for my boat?

117662488.jpg


Thank you

Support will be comprised of two elements

Coring
The core coring adds strength and reduces deflection. With coring of this nature it is the lower layer that provides the greatest strength. The layup schedule will be comprised of multiple layer of bi-axle with a layer of mat between them.

Supports
The supports will be a little different than the tube framing. The last swimplatform of this size on my previous boat I used instead of square tubing - SS 316 seamless tubing. This is what you will find on aftermarket platforms and it worked very well with my previous platform.
Both are essential in the integrity of the platform.

Both longitude and horizontally the platform will have ribs for support but will be comprised of coring and fiberglass. I do not intend on imbedding any SS supports.

I am certainly no expert but using previous experiences and methods used by others

Below is the support I used previously. The existing 4 supports will remain (they extend out 22”) 4 more support will extend out to the edge of the platform and will tie back to the lower section of the transom.

The layout of supports on the Carver will be much different than the Sea Ray below

hhhhhttrrrss006.jpg
 
I added a platform last year and due to the size I had 4 mounts custom made and it still wasn't strong enough so I'm having two additional mounts made this week. I used both Starry and Hogans boats as templates for my platform and mounts.
Picture005.jpg


006.jpg


My platform is free floating on these mounts if there was a way bolt directly to the transom it would add strength Starry has two brackets that tie it together and add a lot of strength.
 
So, are there plans I can buy for the build you're doing. Or is this all just done as you go?
 
quote:

Originally posted by The_Mayor

So, are there plans I can buy for the build you're doing. Or is this all just done as you go?


There is no actual written plans per say. What type of boat are you looking to build one for?

The contours are traced from the actual boat. Each platform of fiberglass project will be unique. If you are building from a mold than the paper patters will help you lay it out. The fiberglass build will require you to put together a layup schedule. In boat building there are formulas and guides. For projects like this you should be able to think it through. Let me know maybe I can help

when I get back from Vacation and start the layup I will update my layup schedule.

Audrey & Starry
Those are very nice supports I think I will look into your design.

One item I would like to bring up in regards to enbeding stainless steel. SS needs oxygen other wise it will rust (actual looks more like rote)
this all depends on the grade of stainless especially 304 in that it has no "moly"

stainless steels has poor corrosion resistance in low-oxygen and poor circulation environments
 
Thank you for the response. I would like to'build an extension on my 33' wellcraft martinique. If I purchase one from one of the builders, it'll be upwards of $5,000 after shipping. I would love to have a project to do on my own to save a little bit of money. I would appreciate it if you could give me a materials list. By looking at your step by step instructions and some research on the web, I feel confident I would be able to handle a project like this. Thanks again, John
 
-Update-

The mold are complete and partially waxed. The Fiberglass will not be here till Monday though.

My fiberglass schedule is a follows:

PLATFORM
2 coats of parting film
2 coats of gel coat no wax
1 layer of surfacing veil
2 layers of 1.5 oz chop mat
1 layer of 1708 Bi-axle
3/8" end-grain balsa
1 layer of 1.5 chop mat
1 Layer of 1708 Bi-axle
1 layer of 1.oz chop mat
possible layer of woven fabric

STAIR
2 coats of parting film
2 coats of Gelcoat no wax
1 layer of 3/4oz surface veil
2 Layers of 1.5oz mat
1 Layer of 1708 Biaxle
-coring on the steps-
2 layers of mat
Possible layer of woven fabric

SEAT
Same as the stairs

I am hoping it gets a little warmer. I heat the garage with a torpedo heater and will need to only run it between layers. My concern is at night with it getting cold out with heat off in the garage.

I will post more when I get started

IMG_2092.jpg


IMG_2094.jpg


IMG_1873-1.jpg
 
-Week end Progress-

Finished waxing and spraying the release agent

Spayed the Gelcoat on the molds

One layer of surfacing Veil (3/4oz Fiberglass) on the swimplaform

IMG_2104.jpg


IMG_2108.jpg


IMG_2107.jpg
 
Fantastic project. Did you consider using the underside of the stairs for storage area(a)?
 
quote:

Originally posted by TurboWarp

Fantastic project. Did you consider using the underside of the stairs for storage area(a)?


Yes. I found a curved hatch on Greatlakersskipper's web site. I plan on storing the motor for the dink in there
 
Keep us posted on your project. What percent complete would you say you were?
 
Week end update

I finished the first layer of 3/4 Surface veil on the plugs. 2 two layers of 1.5 chopped mat on the swim platform. It took 6hrs to complete (1) layer on all the plugs. given my Lay-up schedule I have a lot of work to make my targeted splash date of May 16th.

I have been working on these over the week ends between little league practice and other stuff. i will have to start work on these on the week days at night. Their kicking my butt but I just need to think of how nice and relaxing it will be hang out on

Below is a Photobucket link if anyone is interested in following the progress:

http://s1238.photobucket.com/albums/ff498/mjkkemper/

IMG_2110.jpg


IMG_2113.jpg


IMG_2114.jpg


IMG_2109.jpg


IMG_2112.jpg


IMG_2139.jpg
 
Back
Top